WordPress Push Plugin Setup & Integration Guide
📁 Getting Started
🕐 Updated 53 minutes ago
WordPress Push Plugin Setup & Integration Guide
Easily connect your WordPress site, blog, or WooCommerce store to HyperPush X using our official WordPress plugins. Whether you are using our free Hyper PWA plugin or the advanced HyperPush X Pro plugin, setting up web push notifications takes less than two minutes with zero coding required.
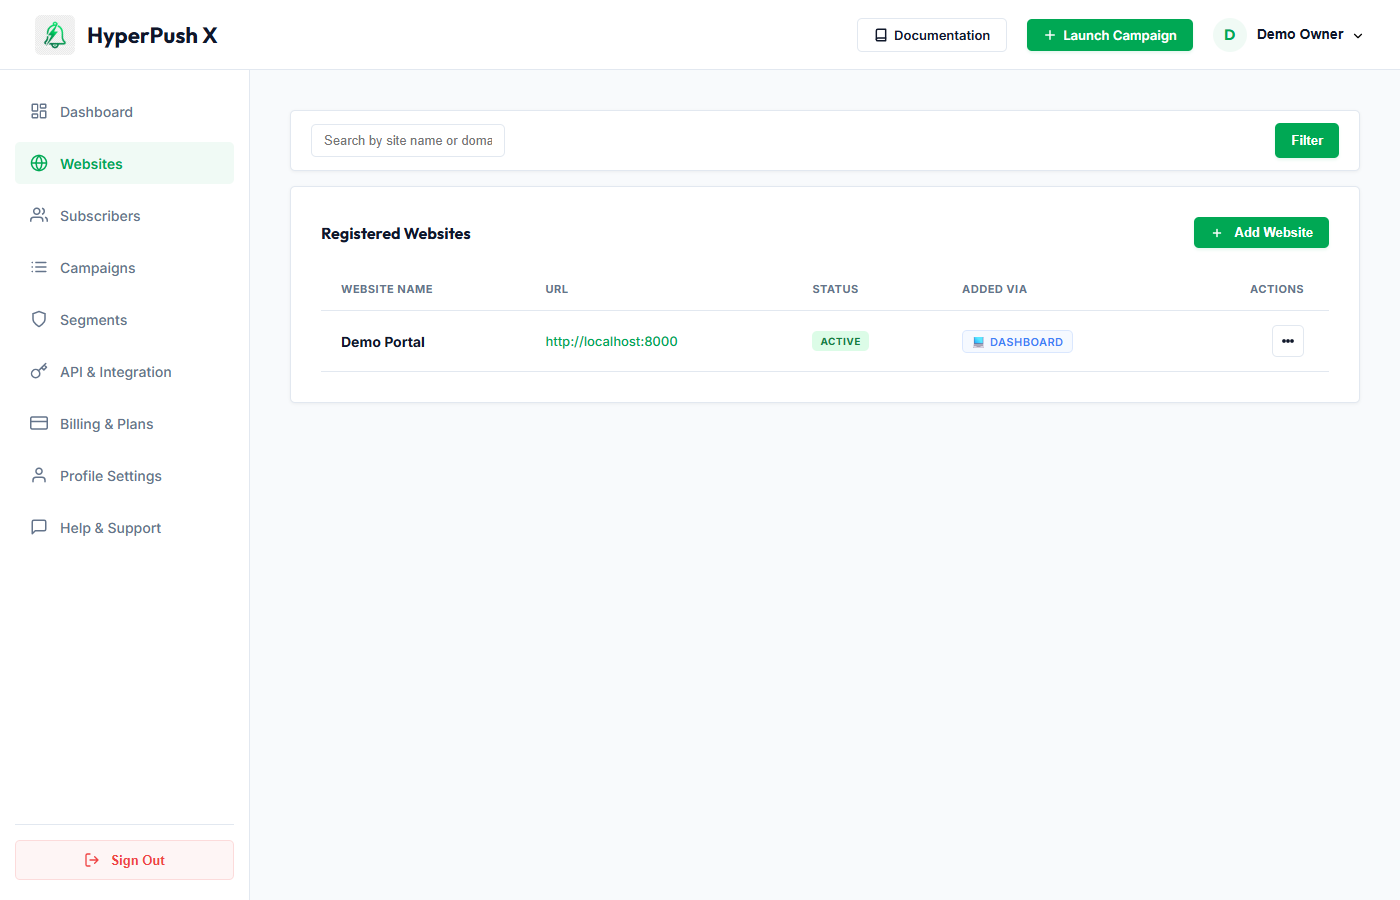
📷 Live System Interface: Dashboard & WordPress Plugin Download
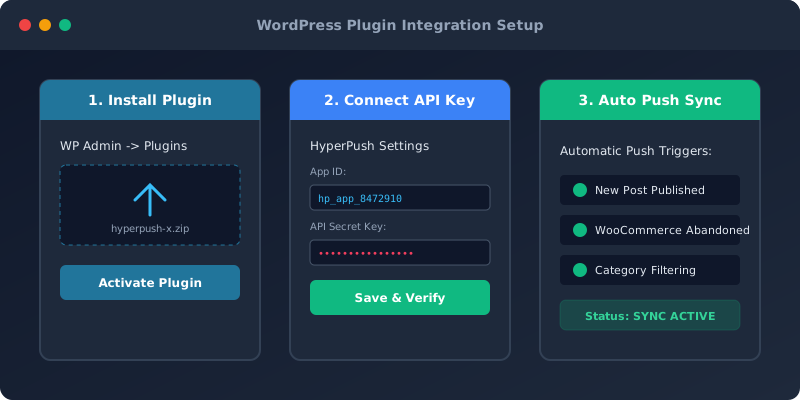
📐 WordPress Plugin Architecture & Sync Flow
🔌 Choosing the Right WordPress Plugin for Your Site
We offer two tailored WordPress plugins depending on your needs:
| Plugin Name |
Tier / Plan |
Core Features & Control |
Available From |
| Hyper PWA |
Free Plugin |
Web push notifications connection, PWA manifest generator, offline page caching, Gutenberg & Elementor install buttons |
Available free on WordPress.org Plugin Directory |
| HyperPush X Pro |
Pro Plugin (Free with Pro Upgrade) |
Full WP-Admin dashboard control, auto-send on post publish, live prompt customizer, auto-sync from Hyper PWA, WooCommerce push alerts, bottom app navigation |
Included FREE when you upgrade to any HyperPush X Pro Plan |
[!TIP]
Upgrading from Hyper PWA?
Installing HyperPush X Pro automatically detects your existing Hyper PWA installation and syncs all API credentials and site settings with zero re-configuration needed!
⚡ Option 1: Free Setup using the Hyper PWA Plugin
- Log into your WordPress admin panel (
/wp-admin).
- Navigate to Plugins -> Add New.
- Search for Hyper PWA (or download directly from WordPress.org).
- Click Install Now, then click Activate.
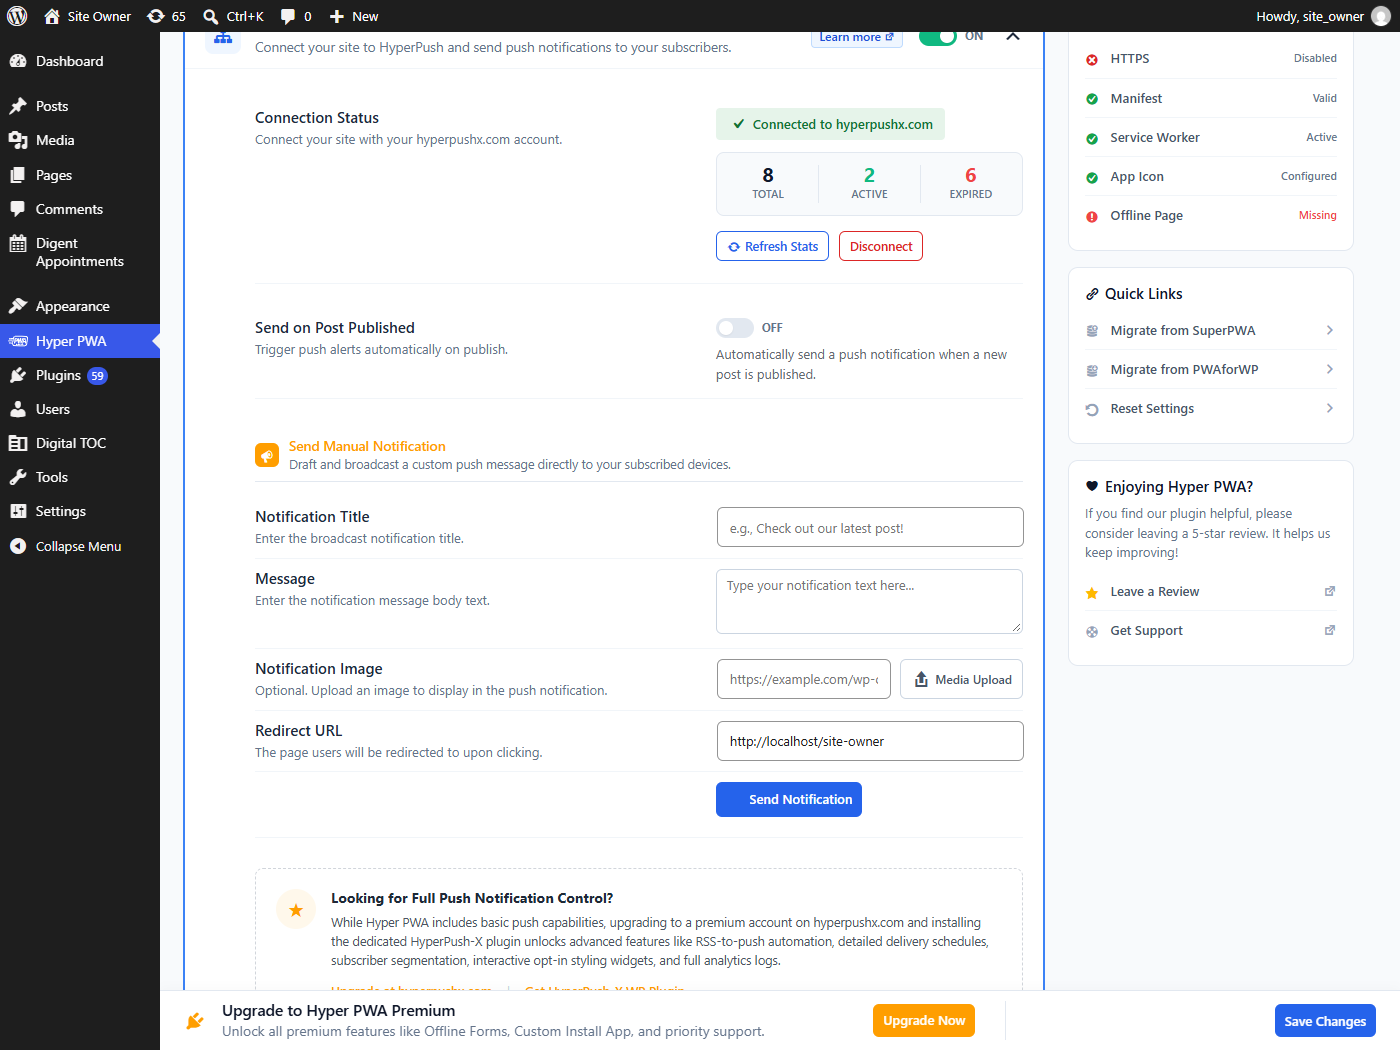
- Open the Hyper PWA menu in your WordPress sidebar.
- Click Core Features -> Push Notifications.
- Expand the Push Notifications settings card.
- Enter your HyperPush X Site Key from your HyperPush X console (
/websites).
- Click Save Settings. Your site is now ready to receive web push subscribers!
🚀 Option 2: Advanced Pro Setup (HyperPush X Pro Plugin)
For complete control over notifications, automatic post broadcasts, in-dashboard subscriber management, and custom prompt builders directly inside your WordPress sidebar:
Step 1: Download the Pro Plugin Package
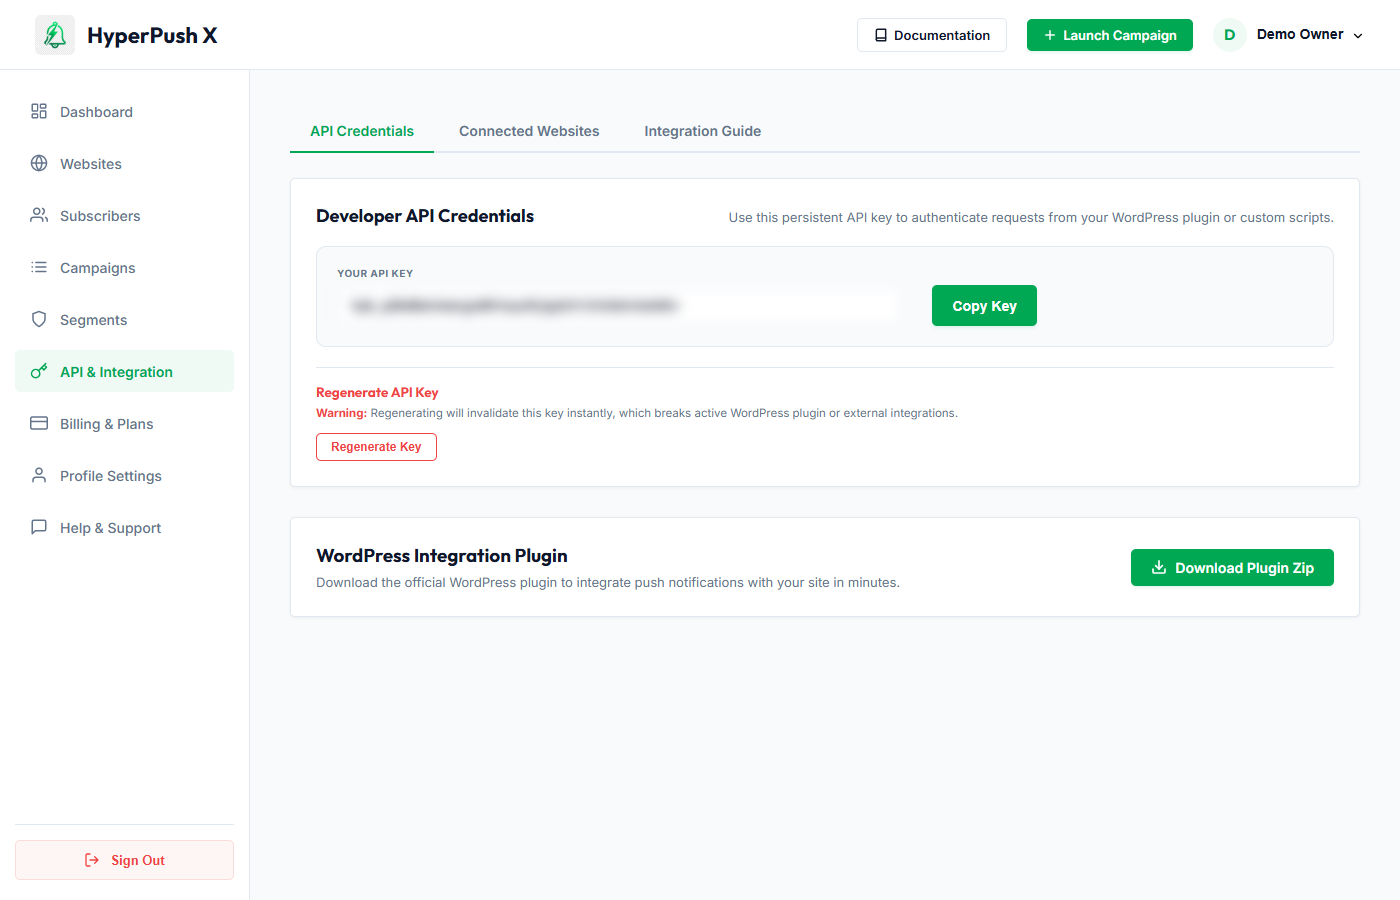
- Log into your HyperPush X dashboard and navigate to API & Integration (
/api-keys).
- Scroll to the WordPress Integration Plugin card.
- Click Download Plugin Zip to save
hyperpush-x.zip on your computer (or click Upgrade to Download to activate your Pro plan).
Step 2: Upload & Activate in WP-Admin
- In your WordPress dashboard, go to Plugins -> Add New -> Upload Plugin.
- Select
hyperpush-x.zip and click Install Now.
- Click Activate Plugin.
Step 3: Auto-Sync & Verification
- If migrating from Hyper PWA: The Pro plugin automatically imports your site credentials and subscriber keys upon activation!
- If starting fresh: Copy your Site Key and API Key from your HyperPush X console (
/api-keys) and paste them under HyperPush X -> Settings.
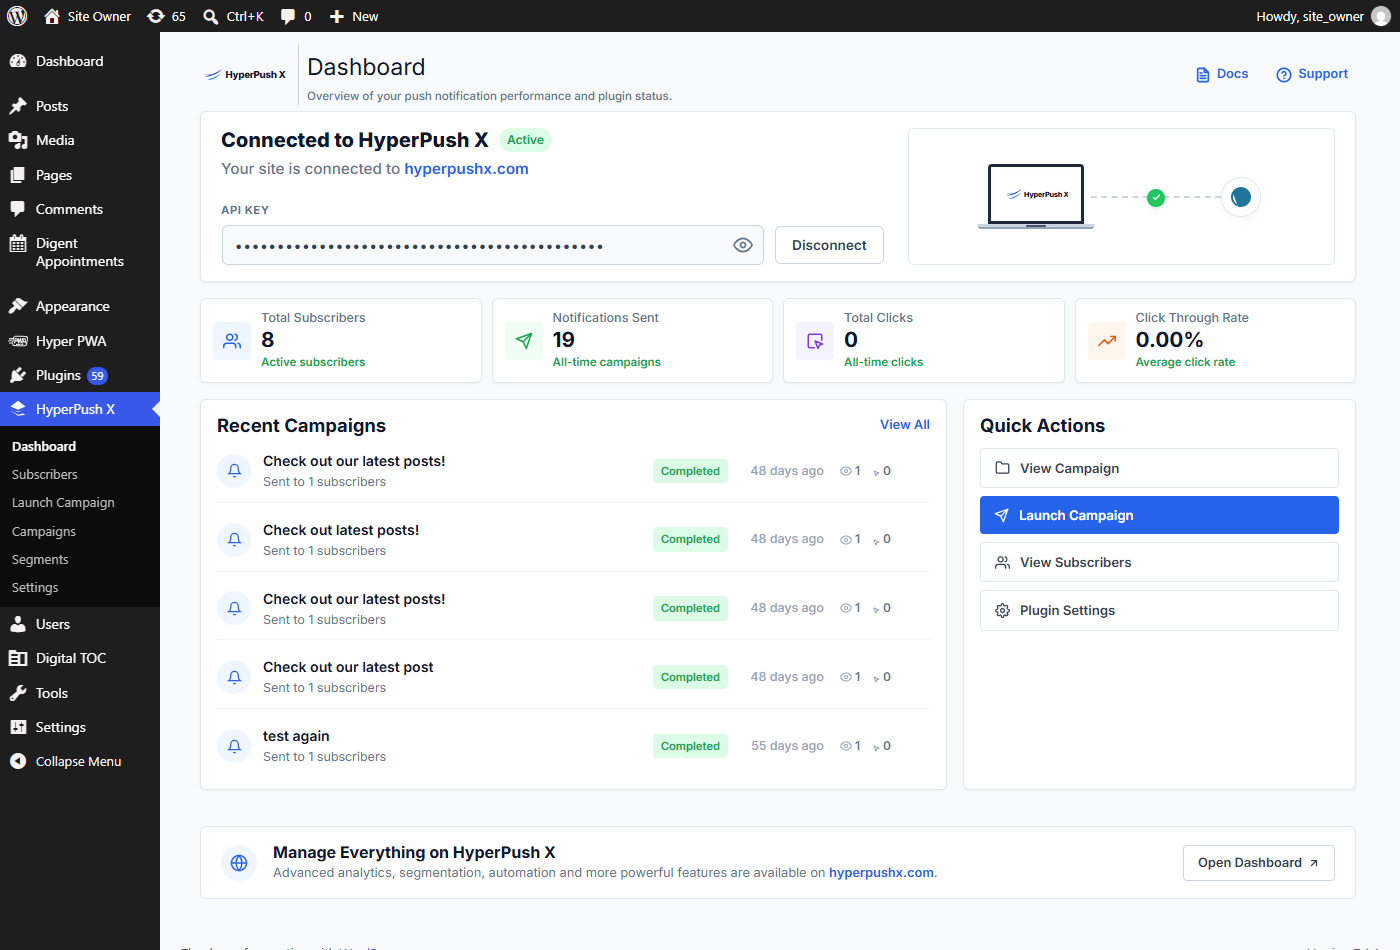
🖥️ Page-by-Page Feature Tour of HyperPush X Pro Plugin
Once activated, HyperPush X Pro adds a dedicated command center into your WordPress sidebar:
📊 1. Dashboard Overview (HyperPush X -> Dashboard)
- Live Subscriber Counter: View total active push subscribers registered on your WordPress site.
- Performance Overview: Monitor total notification dispatches, total clicks, and overall Click-Through Rate (CTR %).
- Connection Health Status: Instant visual badge displaying your server connection status (
Connected), active Site Key, and Website ID.
- Quick Action Shortcuts: Single-click access to launch campaigns, manage subscribers, or adjust prompt settings.
👥 2. Subscribers Management (HyperPush X -> Subscribers)
- In-Dashboard Subscriber Roster: View subscriber profiles directly inside WordPress without leaving your site.
- Device & OS Badges: Detailed breakdown of subscriber devices (Desktop, Mobile, Tablet), operating systems (Windows, macOS, Android, iOS), and browser engines (Chrome, Firefox, Safari, Edge).
- Location & Network Tags: View subscriber IP addresses and country location tags.
- Bulk Subscriber Cleanup: Easily delete or prune inactive push subscriptions directly from WP-Admin.
🚀 3. Campaign Dispatcher (HyperPush X -> Launch Campaign)
- Compose Push Alerts: Draft and send real-time push notifications directly from your WordPress dashboard.
- Custom Campaign Titles & Messages: Add catchy headlines, body descriptions, destination URL links, and custom icon images.
- Audience Segment Selection: Target specific audience segments (e.g., Premium users, WooCommerce shoppers).
- Custom Action Buttons: Add interactive call-to-action buttons (e.g. "Buy Now", "Read Article").
📈 4. Campaign Logs & CTR Analytics (HyperPush X -> Campaigns)
- Historical Campaign Logs: Track every push alert dispatched from your site.
- Delivery & Click Auditing: View exact delivery numbers, click counts, and CTR percentages for every campaign.
- Log Management: Prune old campaign history logs to keep your WordPress database lightweight.
🎯 5. Subscriber Segments (HyperPush X -> Segments)
- View custom target audience segments and filtering rules created in your HyperPush X console.
⚙️ 6. General Settings & Auto-Send on Publish (HyperPush X -> Settings -> General)
- Auto-Send on Post Publish: Toggle automated push notifications that trigger automatically whenever you publish new content.
- Post Type Filtering: Select which content types trigger push alerts (Posts, Pages, WooCommerce Products, or custom post types).
- Auto-Sync Credentials: 1-click credential sync from Hyper PWA.
🔔 7. Opt-in Prompt Customizer (HyperPush X -> Settings -> Opt-in Prompt)
- Layout Selection: Choose between Native Browser Prompt, Custom Slide-in Banner, Centered Modal, or Floating Bell Widget.
- Content Customization: Set custom prompt titles, body messages, allow button labels, and decline button labels.
- Visual Styling: Customize theme colors, button background colors, text colors, and bell widget screen positions (Bottom Right / Bottom Left) with live preview mockups.
🚨 Troubleshooting & FAQs
[!TIP]
Can I use both Hyper PWA and HyperPush X Pro together?
Yes! HyperPush X Pro features Cooperative Execution Mode. It automatically merges service worker background scripts (/hyper-pwa-sw.js and /sw.js) so PWA offline caching and push notifications run seamlessly together.
[!NOTE]
How do I get the Pro WordPress Plugin for free?
Simply upgrade to any HyperPush X Pro Subscription Plan in your dashboard, and you can download hyperpush-x.zip at no extra cost under API & Integration (/api-keys).
 HyperPush X Docs